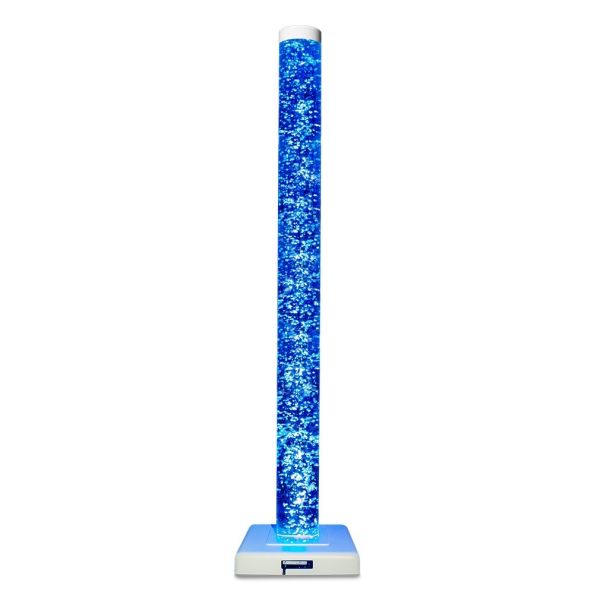
Introducing the Causeway Sensory Interactive Bubble Tube.
The continuously rising bubbles and an array of changing colours make bubble tubes the perfect resource for creating a calming sensory space. The included remote control allows you to select your own colour, speed the lights change, brightness or change the pattern, such as flashing, strobing, fading, smooth or static. Bubble tubes are used as a complimentary focal tool for sensory regulatory activities or used interactively with encouraging visual tracking, colour recognition, physical movement (reaching, looking up) and hand eye-co-ordination.
Available in multiple heights: 1.2m, 1.5m & 1.8m.
Bubble Tube Diameter: 150mm.
Base: W405mm x D405mm x H90mm.
Operation
- Power Input: Use this to connect the power adapter cable. Use only the power supply included.
- Infrared Sensor: Infrared receiver for the included remote.
- External Switch Input: When an external switch (not included) is connected here, it can be used to turn the bubbles on and off.
- On/ Off Switch: When the bubble Tube is plugged into power, use the button toe turn the product on/off.
The Bubble Tube will automatically cycle through a rainbow of colours once switched on. It may also be operated remotely using the included remote or a compatible wireless controller.
Assembly
To begin, you will need to remove the white plastic cover from the Bubble Tube Base. Taking care not to catch the cover on the power switch, firmly pull the cover up and lift away.
- Locate the 4 holes on the bottom of the Bubble Tube with the 4 studs on the Bubble Tube Base Unit. Note that the correct orientation will allow the pipe on each part to meet.
- lPlace a washer, followed by a wing nut, onto each stud and tighten down.
- Connect the tube pip and pump pipe together. The connectors will make a positive CLICK sound when connected correctly.
- The Bubble Tube base cover can now be replaced. Lower the cover over the Bubble Tube and locate back in place on the base. Taking care not to catch the cover on the power switch, firmly press the cover into place.
- Remove the white plastic bung cap from the top of the Bubble Tube.
- Fill a bucket with Deionised Water and pour into the tube. If ordinary water is used, BCB Water Treatment Fluid should be added to the water. This can be added to the water whilst in the bucket, or added directly into the Bubble Tube when full. Approximately 1.5ml of treatment should be added for each litre of water used. (Approx. 20ml per metre of water in the tube). The Bubble Tube should not be filled any higher than the bottom of the white vinyl sticker at the top of the tube.
- The top cap can now be replaced.
The power supply can now be plugged into the product and into mains power.
Draining the Bubble Tube
The Bubble Tube may need drained to allow for cleaning, maintenance or to change the water. With the Bubble Tube turned off and unplugged, remove the base cover as noted above. Place the open end of the separate drain hose into an empty bucket. Disconnect the pump pipe by pressing down on the metal flange of the connector. with this pipe removed, connect the head of the drain hose in its place. Once connected, the water will immediately start to drain. You may wish to use a towel to catch any drips when disconnecting the pump pipe. Once the water has drained out, make sure to disconnect the drain hose and re-connect the pump pipe before refilling.
Trouble Shooting
The Bubble Tube is designed to be low maintenance. If problems occur;
- Power the unit off, unplug from the mains socket an check that the power cable is correctly inserted into the power input.
- Turn the Bubble Tube off, unplug from the mains socket and leave for 1 minute to perform a reset. After this time, plug the Bubble Tube back into power and turn back on.
- The bubbles leave the top of the tube through holes in the bung cap. If the tube is overfilled, then water can escape though these holes. If you see droplets of water on the outside of the tube, then it is likely too full. Ensure the bubble tube is filled to the correct level.
- If water is sighted around the base, ensure that the pipe connectors are correctly inserted.
- If the Bubble Tube is not responding to the included remote, make sure the IR receiver is not blocked, and that the battery in the remote control is not depleted.